Stitching 360 degree panoramas with Hugin
In my last post, I talked about stitching panoramas with Photoshop. There is an open source application named Hugin that can do the same and more. It is dedicated panorama stitching software, so there are many more options available to you.
This guide uses Hugin 2016.2.0.
Hugin supports basic panorama stitching, the same as Photoshop. But where it really shines is 360 degree panoramas. With a panorama viewer like Pannellum, you can view panos much more easily on the web. Here's how you can create one:
-
Take a set of 360 degree panoramic photos. This is the same as a regular panorama, you just end up rotating 360 degrees. You can also stack multiple strips to get a bigger vertical field of view.
-
Open Hugin.
-
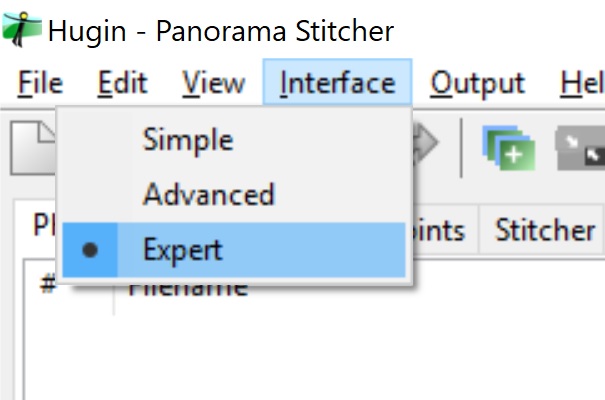
Go to Interface -> Expert

-
In the lower left quadrant of the window, click Load Images. Choose the images you want to stitch.
-
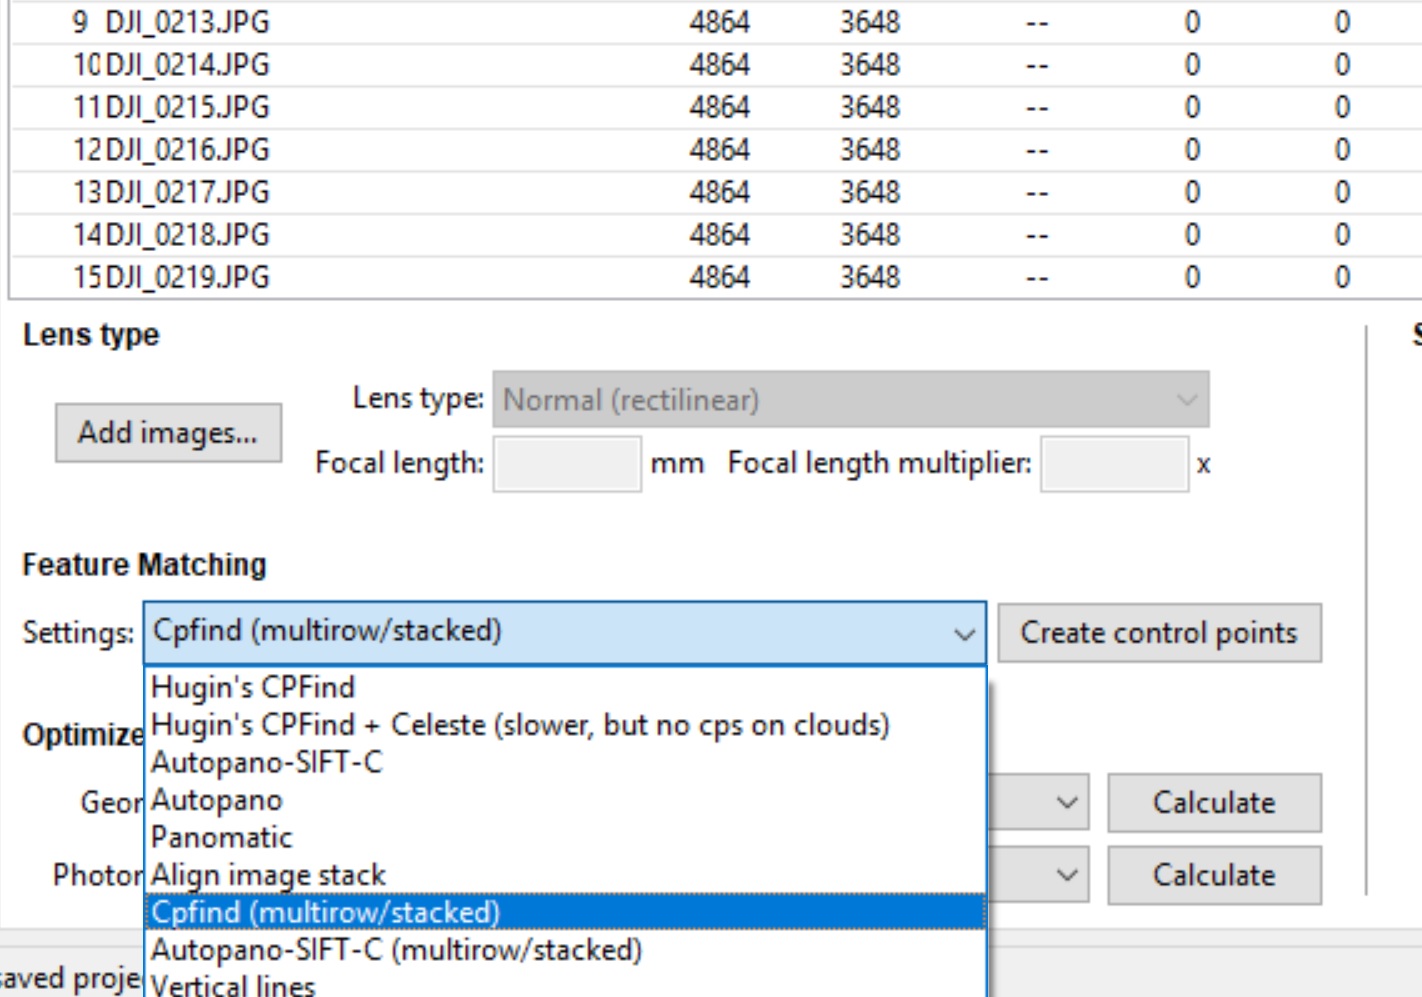
Under Feature Matching, Select Cpfind (multirow/stacked)

-
Click Create Control Points. This may take a few minutes.
-
Under Optimize, for Geometric, keep Positions (incremental, starting from anchor). Click Calculate. This should be fairly quick. Once it's done, click Yes.
-
For Photometric optimization, keep Low dynamic range. Click Yes.
-
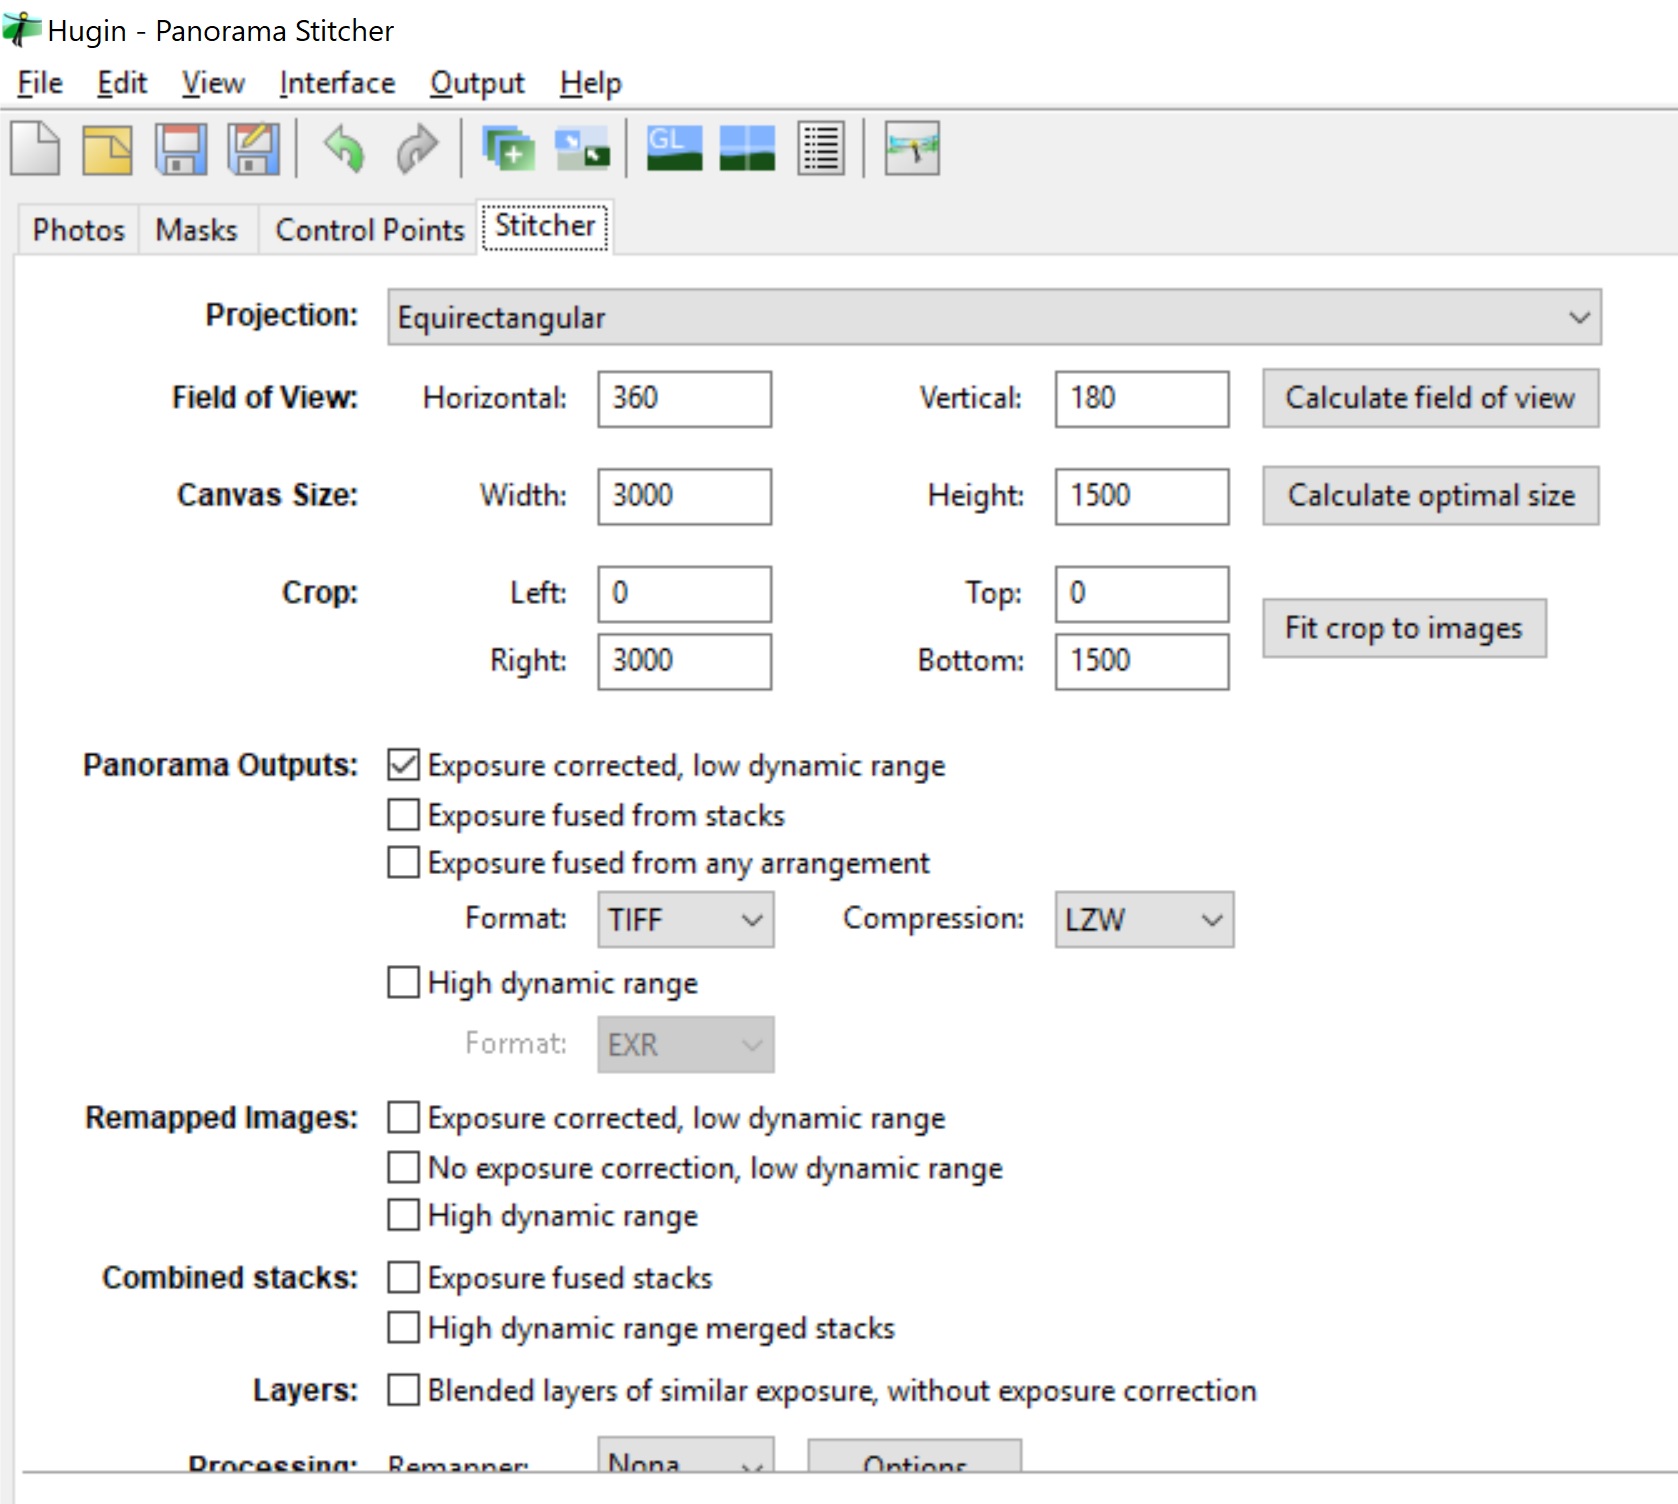
Click on the Stitcher tab.

-
Leave projection as Equirectangular. This is the projection 360 degree panorama viewers are expecting.
-
If you want, you can change the canvas size. Clicking Calculate Optimal Size makes the panorama as big as if the original images were not resized at all. You probably don't want this to be bigger than 10,000 pixels wide.
-
If you like, you can click "Fit crop to images". This will trim any whitespace off the final panorama. This is useful if you have e.g. a hole in the sky directly above the camera.
-
Select the output format you want. It defaults to TIF, which can give very big image sizes. JPG is a nice alternative for smaller files.
-
Click Stitch! This may take a while, if the output size is large.
-
Your panorama is ready. While the raw image doesn't look like a panorama, your 360 pano viewer of choice will re-warp it back to its original state.
Happy shooting!