Stitching panoramas with Photoshop
One of Photoshop's less frequently used features is the ability to stitch together photos into a panorama. Here's how you can go about making them.
This guide uses Photoshop CC 2017.1.1 on Windows 10.
-
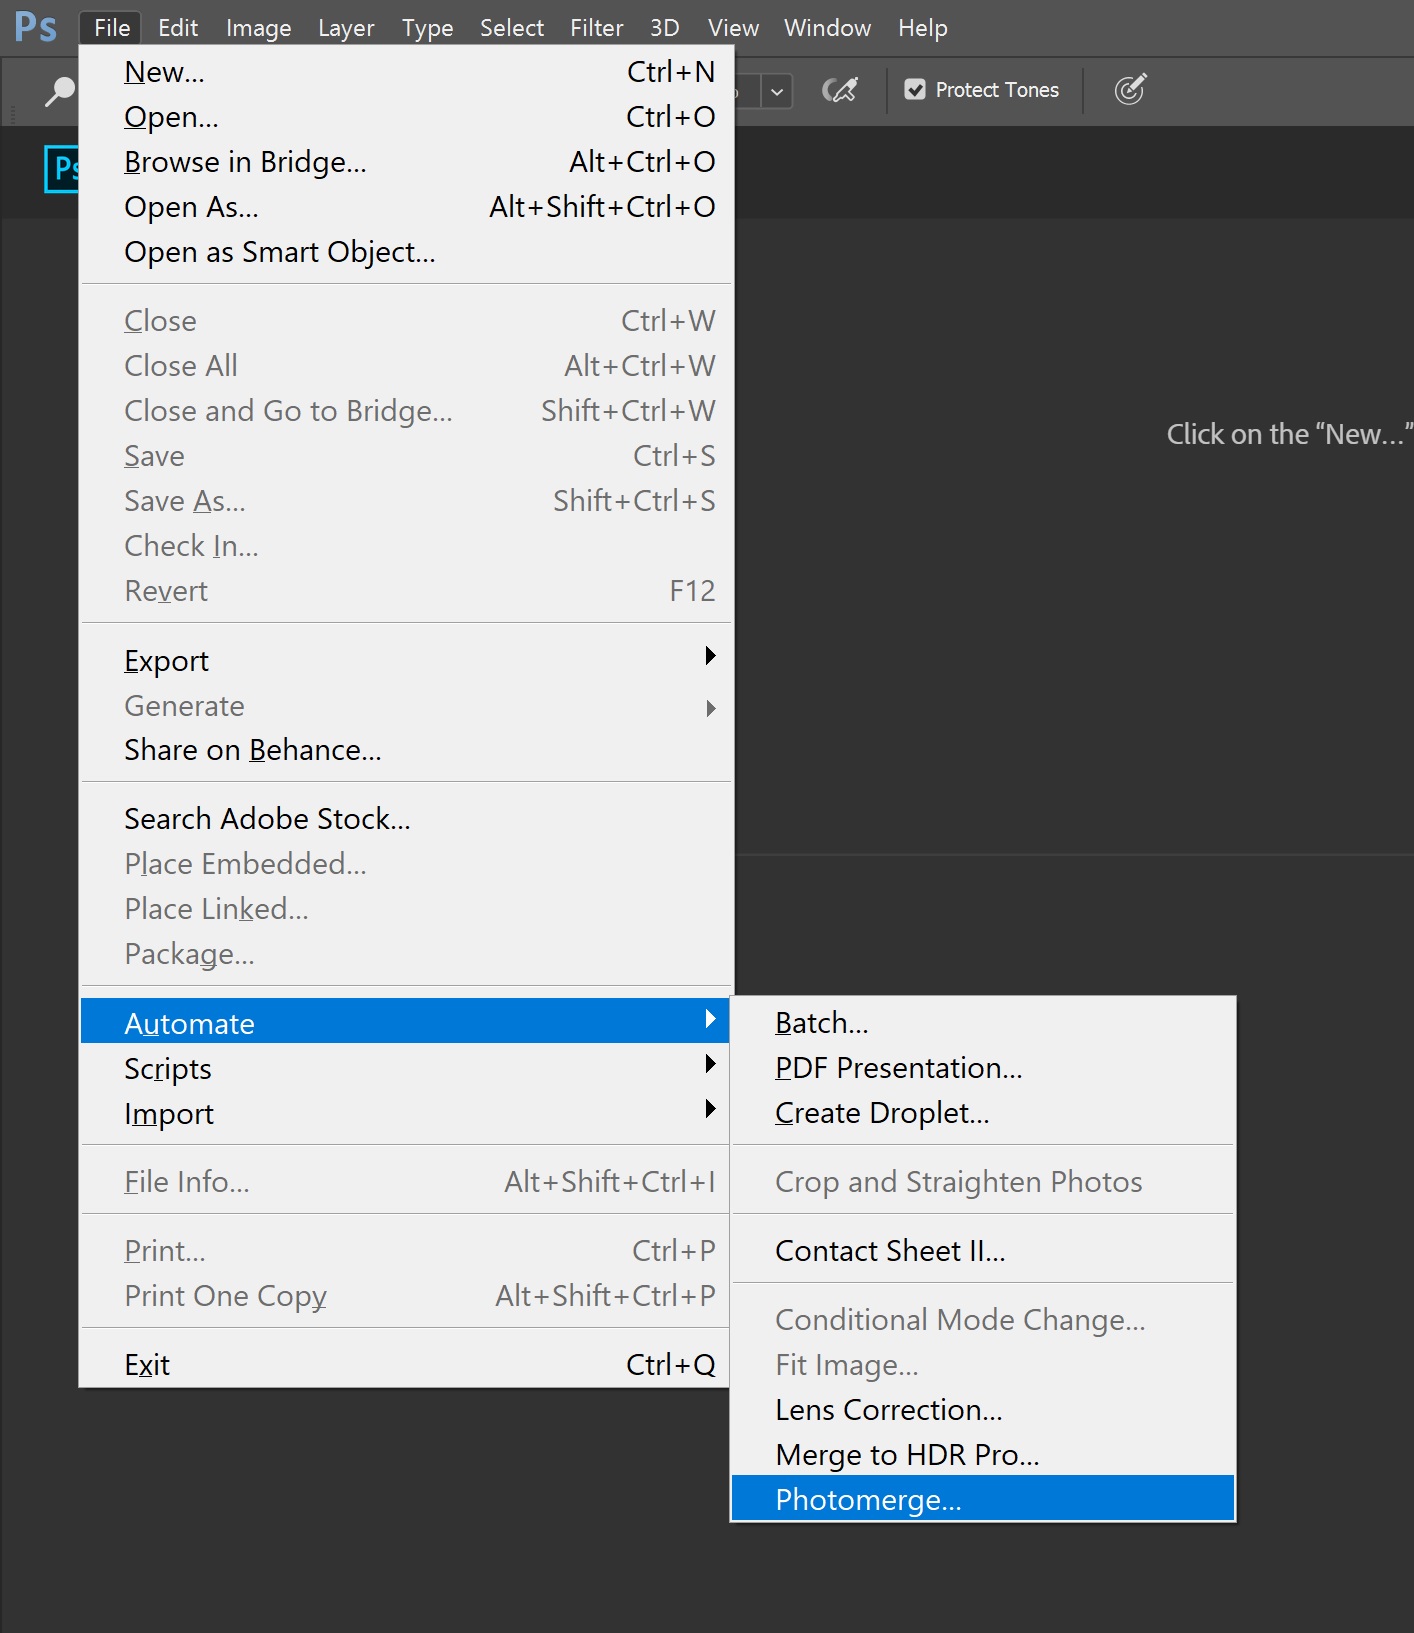
In Photoshop, go to File -> Automate -> Photomerge.

-
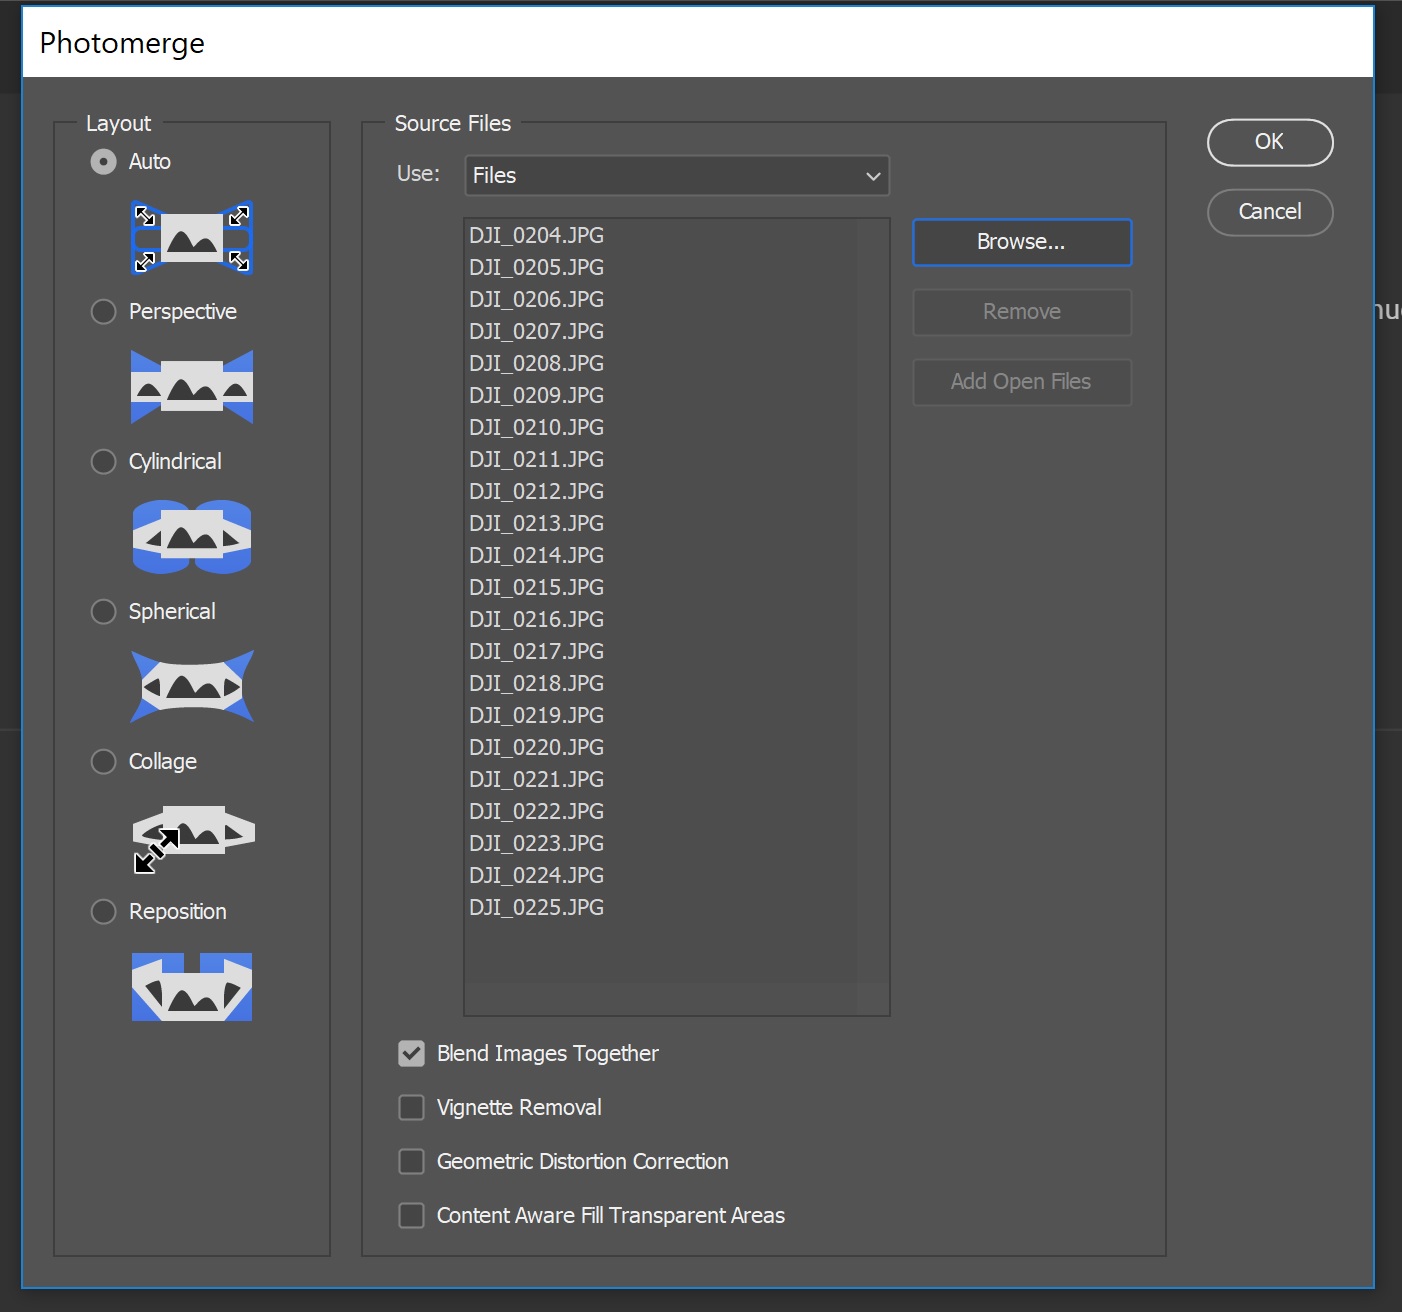
The photomerge dialog will come up. You can experiment with different layouts, but I have found "Auto" does the best job.

-
Hit browse and select the files you want to stitch.
- You can change the options selected at the bottom, but the defaults are a good starting point. They don't affect the stitching results, just the blending of images once they are aligned.
- Hit Ok. Photoshop will load the images and start stitching. This may take a few minutes, depending on how big your final panorama is.
That's it. Once the stitching is complete, you can crop the image to your liking, make modifications, or anything else Photoshop permits.
Happy shooting!